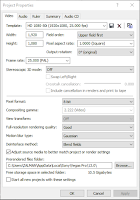
After gathering all my footage i uploaded it to Sony Vegas Pro to begin the editing process. First of all, I had to create the project file for the film to go into, part of doing this is setting up the ratio and frames in which I will be creating the video, and it is of upmost importance that this matches what the film was shot in to avoid 'ghosting'.

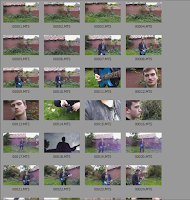
As I shot more than was necessary, and there were unsuccessful takes I had to search through the footage before finding the desired ones. I had a total of 25 minutes of footage to sort through and even after discarding the shots I didn't want I still had excess footage. This allowed me to develop the narrative as best as possible, trying out various shots in various places on the time line.
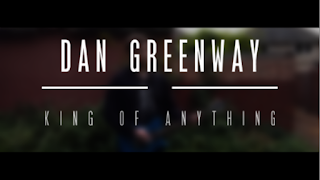
 The first task I decided to undertake was the title sequence at the beginning of the video. To do this I created 3 more layers over the top of the footage I'm using for the intro. After that I chose a font which I found online and began to type out the titles 'Dan Greenway' and 'King of Anything'. However, just having the titles appear on the screen without any transition was dissatisfying and didn't have the professional look I was aiming for. So, I then set about timing transitions on the intro to make it look as good as possible. I decided the text should fade in over the top of blurred out footage in the background. After doing this, and timing it right I watched it back but it still didn't look as I desired, there was an empty space in the middle of the screen that needed filling up. I decided that two, thin white lines should fill the space as it looks modern and professional as well as seperating the artist's name and the name of the song.
After creating the titles, I then worked on ordering the rest of the footage. I ordered it into what I thought told the narrative the clearest and had performance sections spread out evenly too. After deciding that the order was optimal I then went about colour correcting some issues I had noticed when watching the footage back. To correct the colour of the footage I had right-click the individual shots and select 'media event fx' which then allowed me to add a colour corrector to it. When presented with the colour corrector I had to use the tool to lighten the dark shots, and darken the light shots to create a single, similar light theme.
I am now at a point where I was confident with my work and decided to render the footage, completing the editing process. To do this I simply clicked 'file', then 'render as' and selected the rendering option that matched what my footage was shot in, and what the project file was created in (1080p).


No comments:
Post a Comment