To document all of my coursework I used a website called Blogger. On this website I would publish every piece of coursework I had done in chronological order to make it easier to see my creative journey. As well as this, I learnt how to format html posts when embedding videos and prezi presentations. Blogger allowed me to go back to previous posts and edit them, topping them up with knowledge and work I didn't have previously. It also allowed me to save drafts, this meant that I could save a post without publishing it, it also allowed me to work on the same post both at school and at home.

One of the benefits of Blogger, as aforementioned, is the ability to embed things. Therefore I could add items such as pictures and videos to my posts to enhance them, it also makes it much clearer as to what i'm referring to in my posts as there are physical images. As well as this when researching existing music videos I could embed the physical video so it is easy to refer back to in the future as well as for the ease of anyone who reads the posts.
One of the media technologies I used to plan my project was an online mind map website called Bubbl.us. On this website I could create a clear digital mind map in a time efficient manner. I preferred to use this over hand drawing a mind map as it was quicker, and should I have made a mistake I could easily remove it instead of starting again. As well as this, it was easier for me to create a clear mind map due to the extra room on the page as well as being able to easily colour code it. I used this website for my second project after it proved successful for the first project.


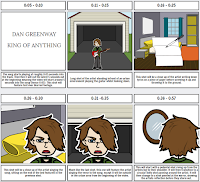
Then, I created my storyboard on a website called Storyboard.me. Once again I found this website useful as it was quicker than hand drawing and looked a lot clearer. I did this to create a simple 12 panel storyboard using images that the website provided. However, for my second project I decided it was better for me to hand draw it rather than to use the website as I found that it was limited in what I could add to my storyboard such as poses, props and locations. Hand drawing gave me more room for creativity and to convey my narrative better.

I then used word to create a risk assessment. I inserted a table to fill out my risk assessment on as it is easy to add more cells to it and it is more efficient than using another similar program such as Excel. The fact that I could use varying numbers of rows or columns allowed me to create the perfect table for my risk assessment, making room for the risks identified, a scoring system for a risks severity, measures to prevent the risk and how many people would be at risk.
To record my footage I used a DSLR camera as it gave me more freedom than a simple point and shoot camera. Using the DSLR I could change the ISO of the camera to make it easier when filming in darker or lighter areas. As well as this, the actual camera quality is better than the average point and shoot camera. I believe using a DSLR is also better practice for the future and it teaches me more about the equipment modern media is produced with.
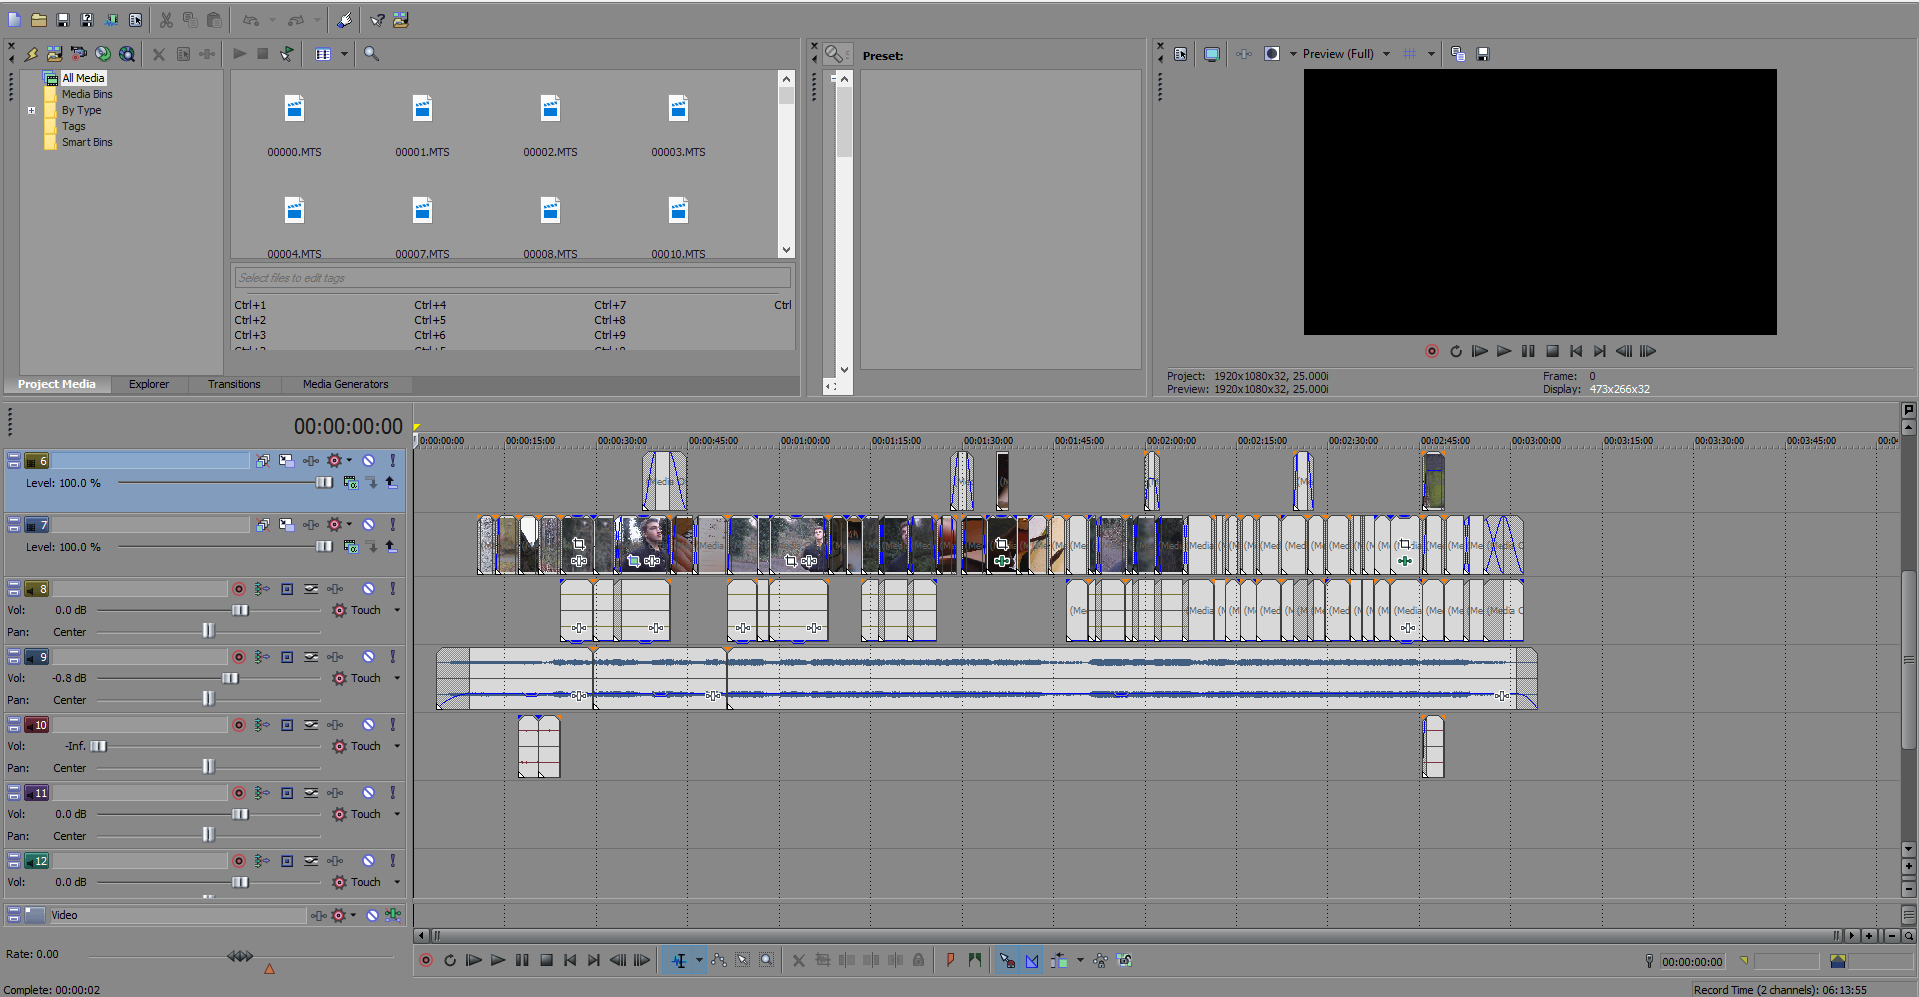
To edit I used a program called Sony Vegas. I used Sony Vegas as compared to it's main competitor (Premiere Pro) as I prefer it. I find it simpler and easier to use because of it's layout and minimalistic appearance. On Sony Vegas I created a new project file, added my footage, cut it into the correct sequence and then edited it, such as colour correction. As well as this I created my title sequence on it with ease, using a 'Gaussian blur' filter over the footage behind it. To add the titles i had to create a new video track, then add text. I could then edit the text changing the wording, font and size on the menu that opens. As well as this, I could then move the text by changing its coordinates to make it sure it was precisely were I wanted it. To add the Gaussian blur i had to right click the footage, then click 'add video fx'. This opened another menu where I had a range of effects to choose from and I chose Gaussian Blur. I added the footage and then edited the timing so the blur slowly goes away in time with the titles.
Importing files into Sony Vegas was very simple, you simpy clicked 'file', then 'import' which would open up your computers file directory. Once on this screen you could then browse your computer to find the files you wished to import. On my PC it was under my Local Drive (D:) which is where I saved all my footage. To get the footage onto the computer itself I had to take the memory card out of the camera, then put into an SD to USB converter, it would then show up like a USB flash drive on my PC. From there I could transfer the files over to one of my internal hard drives.

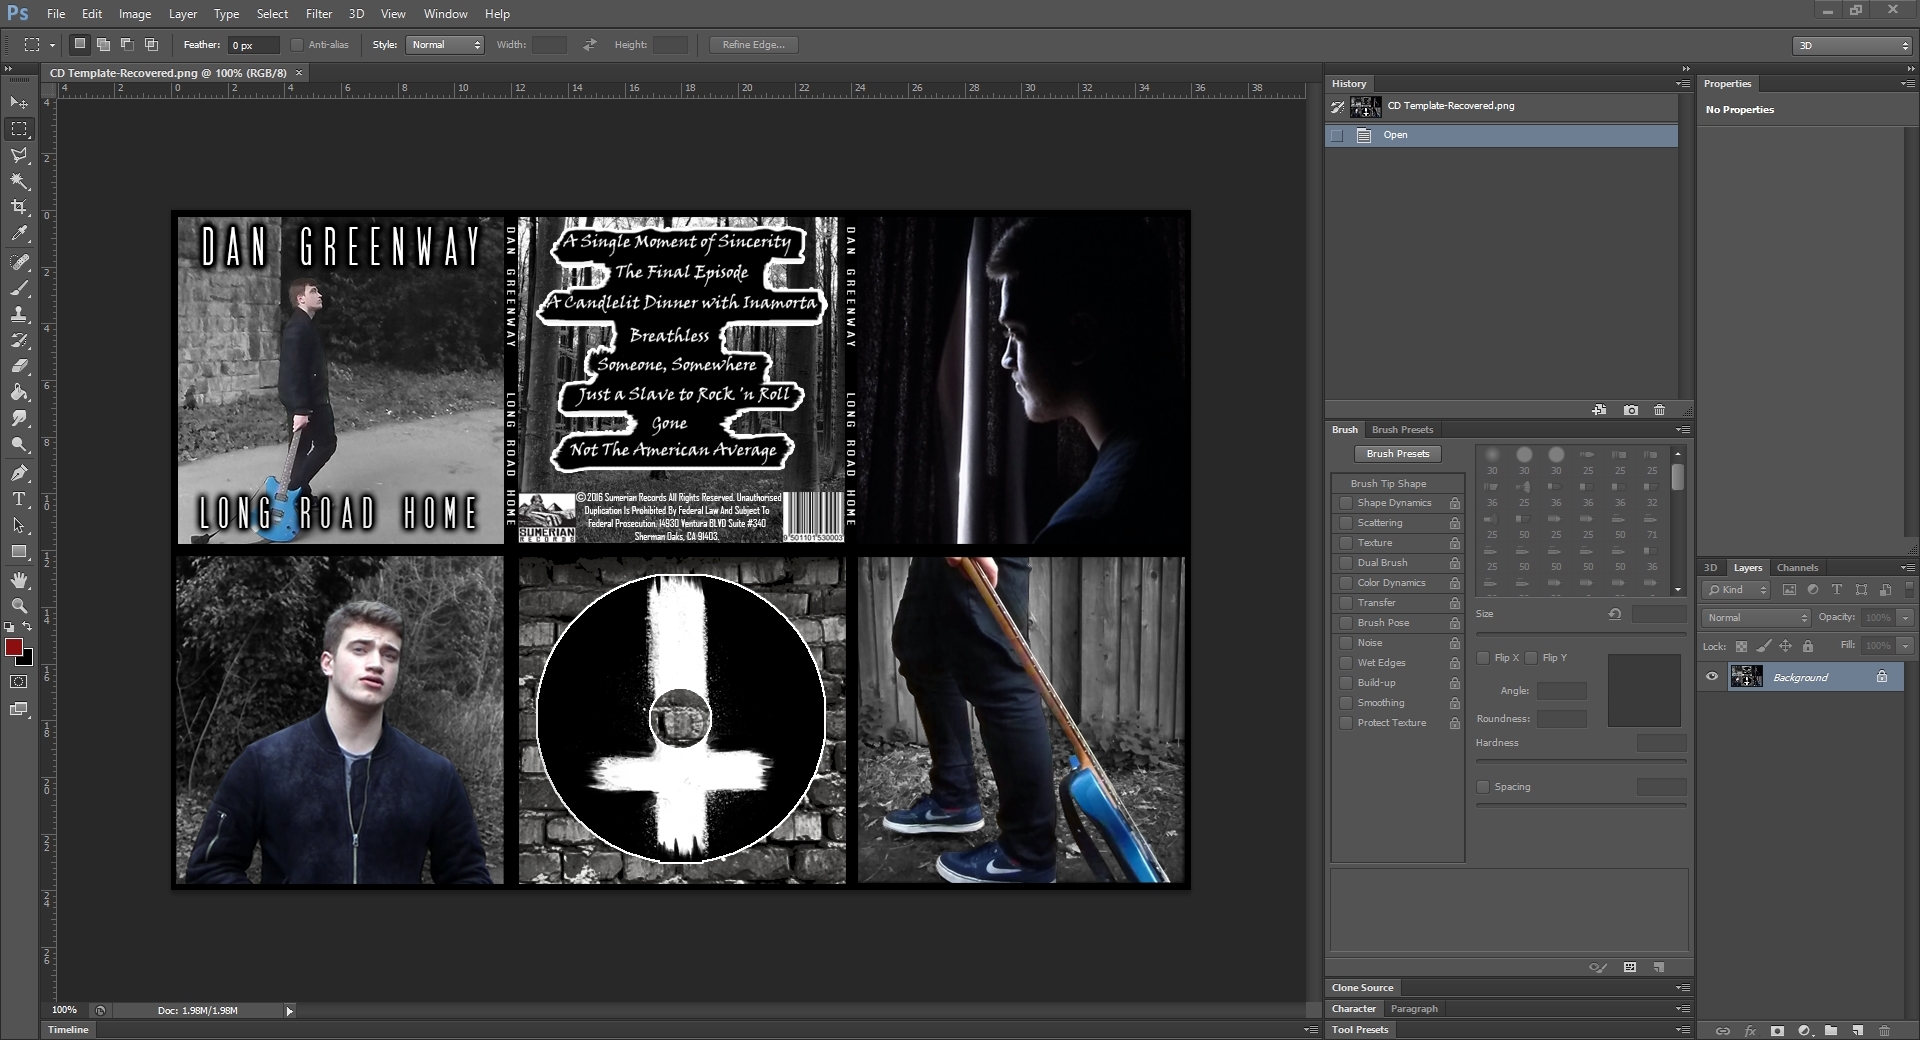
When creating my ancillary texts, I used Photoshop to first create a template for my digipak. This way I could then open my images and put them on top of the 36cm x 24cm template i'd previously made. I chose these dimensions as each panel would be 12cm x 12cm, and I was creating a tri-fold digipak. Layering the images successfully over the top was easy, by reducing their opacity to 50% I could still see them as well as the template behind them. It allowed me to get the correct ratios for my images as well as leaving room for 'ink bleeding' like I'd have to do for a real digipak. I did this by creating 'guides' to create the areas that I could work in without the ink bleeding. The guides were visible lines that would not be on the printed product however. It also allows me to create artwork to go on the disk and behind where the disk is held. Photoshop also allowed me to edit my images accordingly, creating monochrome effects for most of the image whilst keeping certain parts in colour. I added barcodes, copyright text as well as a production company logo (Sumerian Records). I used adjustment layers to change the colour of some of my images to black and white to link in with the themes of the album and music video. I was comfortable with using Photoshop to develop professional looking results due to previous practice with the product, it was, in my opinion, the best software to use as it is the industry standard.


When doing my evaluation I used multiple technologies to make it as a appealing as possible. I used a presentation software called 'Prezi' as it is extremely simple to use as well as very easy on the eye with its transitions. For evaluation questions one and two I used Sony Vegas once again to edit them, as well as to record my voice as Sony Vegas has an option to record sound from an external microphone. I recorded my voice with my 'Blue Snowball' microphone to make sure it was high quality audio. I added in text to my evaluation questions by using the 'add text layer' option of Sony Vegas. I also added in other music videos that I studied when researching by downloading the MP4 file and then importing it into Sony Vegas.


